How to sanitize RV water tank? Having a supply of fresh and clean water is important whenever you go on a long road trip with your family in your RV. While you can use water filters in different parts of the RV’s water system, you will still perform periodic sanitation of the water tank and the water lines.
May you like: RV Heated Water Hose
This is crucial since sediments and other impurities can still accumulate on the surfaces of the water lines and tank. Draining the tank and flushing the lines are not enough. You have to sanitize the RV water system, too, to kill any microorganisms that may be present. Here are 5 easy steps.

 Prepare Your Materials
Sanitizing your RV’s water system is easy. There are only a few very important materials that you have to prepare. You will need household bleach, a measuring cup, and access to water. You can do this at designated RV rest stops. Just make sure you pick a stop where there are no limits to the amount of water you can use.We recommend preparing the sanitizing solution first. The ideal ratio of bleach to water is ¼ cup of bleach for every 15 gallons of water tank capacity. If your RV has a water tank capacity of 120 gallons, then you will need 2 cups of bleach (120 ÷ 15 = 8; 8 x 0.25 = 2 cups). Fill a pitcher with water about ½ to ¾ full and add the bleach.
- Prepare the RV Water System
The next step is to prepare your RV’s water system. This involves several steps.
 Fill the RV water tank until it is half full. Do this by turning on the Fresh Water Tank Fill switch. Switch it off once half-filled.
 If your RV has a built-in icemaker, you should switch it off, too. You do not want to have bleach in your ice once you are done with the sanitation process.
 Some RVs have a drinking water dispenser built into their kitchen countertop. There is a filter cartridge under the countertop. The water connections of the water filter will have two bypass valves. Close these valves so as not to introduce bleach in your water filter.
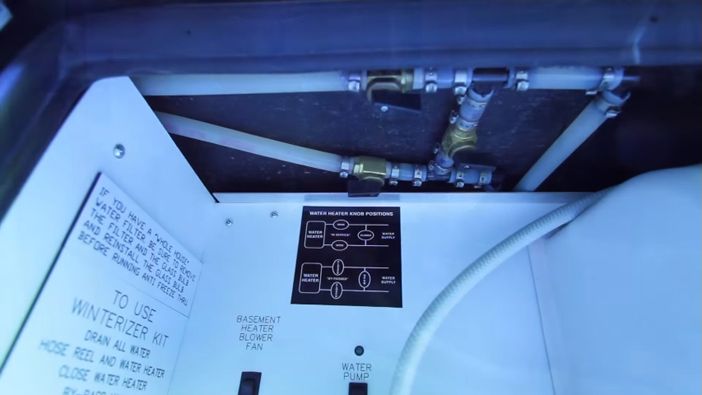 Check the plumbing of your water heater tank. Close the valves to create a bypass, too.
 There are RVs that have a winterizing kit. This is where you will attach a plastic hose that will go to the bleach solution.If your RV does not have a winterizing kit, it should have a water fill valve. This is where you will have to insert a tube that will siphon the bleach solution into the RV’s water system.
- Sanitize the RV Water Tank
Once you have accomplished the preliminary steps, you can start sanitizing your RV’s water tank and lines. Make sure that all water fixtures are closed or switched off. All filters and heating elements should also be bypassed at this time. Close the faucet or disconnect the water hookup.Turn the Fresh Water Tank Fill to the ON position.
 Open the valves of the winterizing kit and dip the end of the plastic tube in the bleach solution. If your RV does not have a winterizing kit, then insert the other end of the plastic tube in the Water Fill port.
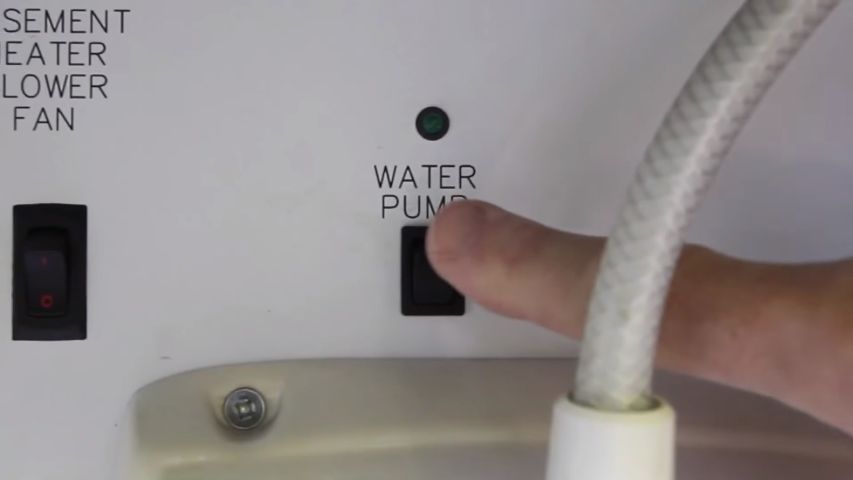
 Turn on the water pump of the RV to draw the bleach solution from the pitcher. Once emptied, turn off the water pump.
 Get another pitcher and fill it with clean, freshwater. Dip the tip of the plastic tube to rinse the RV water lines and the plastic tubing. Turn off the water pump once you are done rinsing the plastic tube.
 Close the valves of the winterizing kit to put the system in normal operation.
 Open the water line from the main water connection or the faucet to fill the RV water tank. Check the underside of your RV and locate the water tank overflow tube. If you see water dripping from this tube, you know that your RV water tank is already full.
 Turn the Fresh Water Tank Fill to the OFF position. Turn off the faucet, too.
 Turn on the RV water pump and open all the different water fixtures in your RV. These include faucets, showerheads, and other devices where water comes out from. Make sure to open the cold water faucet first and wait until you smell the scent of bleach. Once you smell bleach, you can open the hot water faucet. Do this procedure in every water fixture that you have. You should be able to smell the bleach from the water coming out of these fixtures.
 Leave the Sanitizing Solution in Your RV
The bleach solution will take some time to sanitize every bit of surface in your RV’s water system. It is ideal to take your RV for a drive. This will shake and agitate the bleach solution in the water system and aid in the sanitation process.We recommend letting the solution sit in the system for 48 hours. This will kill any microorganisms and other harmful contaminants that may be present in the RV water system. Remove the Water and Refill the Tank
The last step in sanitizing your RV’s water tank involves draining the tank and flushing the waterline. This will help you get rid of the bleach solution in your vehicle’s water system. Be patient as the process can take several hours.It is best to connect a sewer line in your RV’s wastewater tank. This will help minimize spilling the bleach solution on the ground. You can collect the solution in a large container or empty it into a designated drainage facility.
 If your RV does not have a winterizing kit, it should have a water fill valve. This is where you will have to insert a tube that will siphon the bleach solution into the RV’s water system.
 Turn the Fresh Water Tank Fill to the ON position.
Sanitizing your RV’s water tank and water lines is easy. However, it does take at least two days for the solution to work its wonder. Just make sure that you have the correct materials ready and you are going to perform the sanitation in the correct location.
Hoping you learned from this post on how to sanitize RV water tanks. Stay tuned with us for the next updates.


Its not my first time to go to see this site, i am browsing this web page dailly and obtain pleasant information from here daily. Cherey Ole Pavlish Myrilla Flinn Baten